 Organize the work of your team
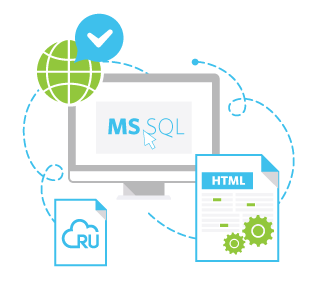 Use one of the three licensing options
25/6/2026


Use the panel for free when creating a VPS
on any tariff* until the end of 2026

Moscow, Korolev, Kazan, St. Petersburg, Yekaterinburg, Almaty, Astana, London, Zurich, Frankfurt, Novosibirsk, Amsterdam, Vladivostok, Izmir, Kransodar, Omsk, Murmansk, Erevan, Ufa, Bellingshausen Station, Minsk, Samara.
Choose your data center

only 149RUB/month |
from 1 599RUB/month. |
1 448RUB/month* |
Offer is limited

|
Turbo 1
1,149RUB/month
2,432RUB/month
|
Turbo 2
1,899RUB/month
4,579RUB/month
|


|
SELECT OS
2012 R2
Windows Server 2025
Windows Server 2022
Windows Server 2019
Windows Server 2016
Windows Server 2012 R2
Windows Server Core 2025
24.04
Ubuntu 24.04 LTS
Ubuntu 22.04 LTS
Ubuntu 20.04 LTS
13
Debian 13
Debian 12
Debian 11
10
CentOS Stream 10
CentOS Stream 9
CentOS 7
9
Rocky Linux 9
panel disabled
0 RUR
0 RUR
CentOS
* Control panels are only available for Linux OS
|
Order Summary
SELECTED PARAMETERS

Total:From:
 - per month - per month-
-
The tariffs of the "Smart" line are temporarily unavailable for ordering in the selected data center
        |
|||||||||||||||||||||||||||||||||||||||||||||||||||||||||||||||


TEAM ACCESS |
ADJUST MS SQL |


 |
Excellent hosting provider! We have been working with RUVDS for a while and are content with the prices and quality of service, as well as with the fact that so far there have been no failures. Their employees are very helpful and are happy to answer even the simplest of questions. We use this service ourselves and recommend it to our own clients. This service has great prospects! Best of luck and thank you! Ilya Mutigullin mfd.ru |
 |
OBRAZOVANIE (JSC) uses the services of MT FINANCE and confirms that to date they have been fulfilling all of their obligations on time, strictly within agreed deadlines and providing services of due quality.
We are satisfied with the services provided by MT FINANCE and recommend this company as a professional and reliable partner. Elena Kuznetsova www.obrbank.ru |
 |
FINAM JSC began cooperating with RuVDS in virtual machines services for its customers in the third quarter of 2015. The users of this service highly assessed the quality and functionality of the services, especially in terms of customizing the solutions to the needs of an individual client. As a customer, we greatly value the client-oriented approach at RuVDS, their speedy response, as well as the uniqueness of some services, provided by them to partner companies. Looking forward to durable mutually beneficial cooperation. Sergey Slukin www.finam.ru |
 |
I work in the department of "Internet broker" as the head of the department "Trading platforms and user support". During the time of cooperation, RuVDS has established itself as a team with excellent professional skills and good knowledge in the field of virtual servers. These qualities, as well as the high technological platform of RUVDS, helped us to launch several large VPS projects on their platform.
In simple terms - RUVDS team is ready to accept any challenge from the most demanding customer and you can be sure that they will cope with it. Sheviakov Pavel bcs.ru |